HOW TO PHOTOGRAPH A GARAGE DOOR SPRING
When you need our help choosing the correct spring, it is often useful to take photos of the garage door and the spring. However, how you take these photos is important, as unsuitable photos may not provide enough information. This guide explains what you should photograph and how to take the pictures.
PHOTOGRAPHING THE SPRING
Step 0
Turn on all the lights, even if it is daytime.
Step 00
Clean the lens of your phone camera.
1. Photograph the spring as follows:
- Position your camera in front of the centre of the spring. Do not
photograph it from the side.
- The centre of the spring should be in the centre of the photo.
- Both ends of the spring must be visible in the photo.
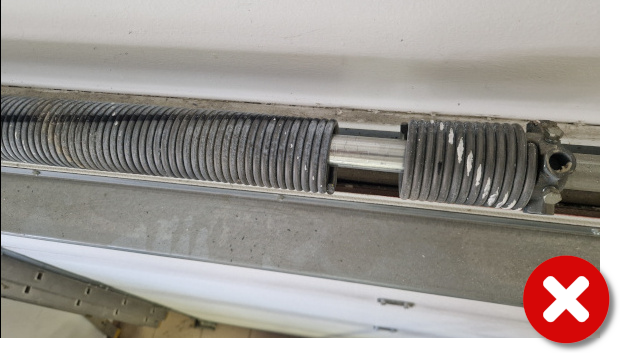
- only one end is visible
- photographed from the side
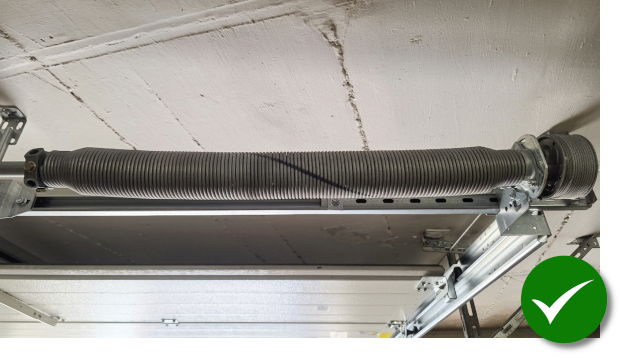
- Camera positioned in the centre
- Centre of the spring in the centre of the photo
- Both ends are visible
2. Take a close-up photo of the end of the spring wire as well.
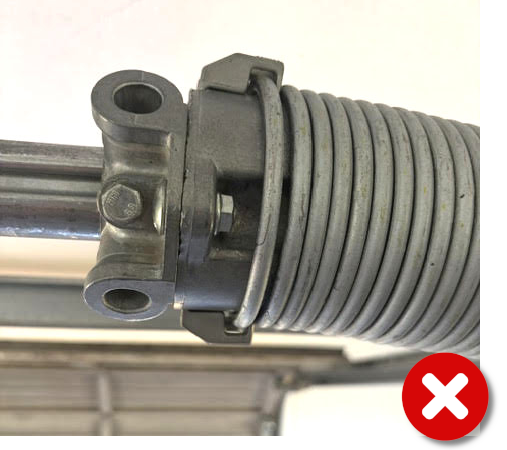
- The end of the wire is not visible.
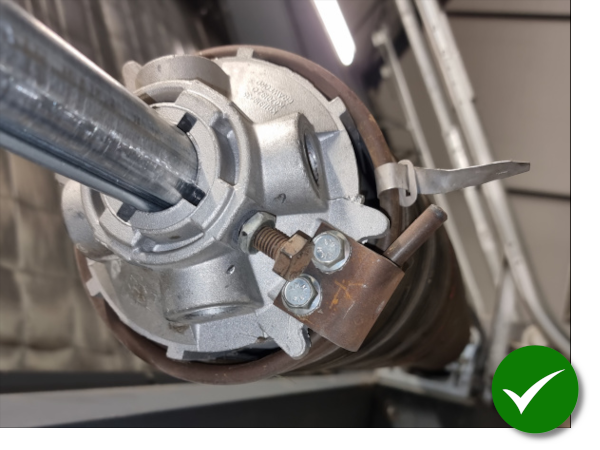
- The end of the wire is clearly visible.
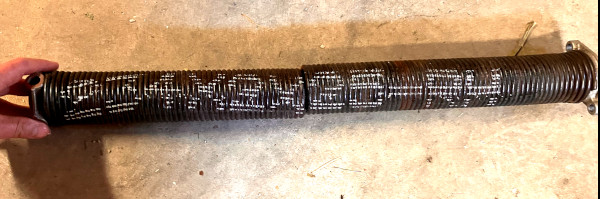
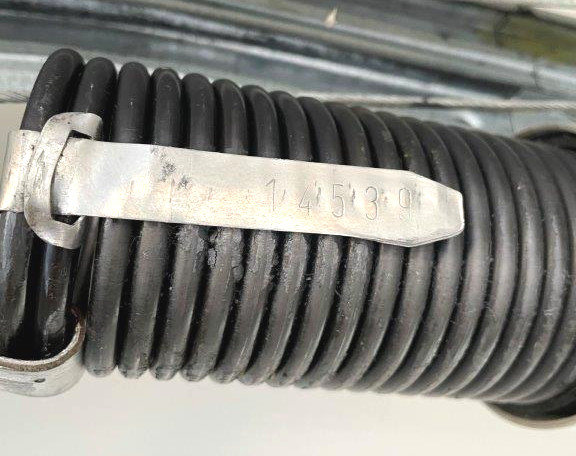
3. If there is any writing or marking on the spring, photograph it as well.
For example: painted markings, aluminium tags, plastic labels, etc.
4. Photograph all the other springs as well.
Photograph all the other springs using the same method described above, even if they are not broken and you do not need to replace them.
If the spring is mounted high up, try to get as close to it as possible and use a ladder if necessary. Photos taken from too far away are often unusable because we cannot count the coils and important details are lost.
PHOTOGRAPHING THE GARAGE DOOR
We may need additional information to manufacture the spring. For this reason, it is useful to photograph the garage door as well, not just the spring. If you are already taking photos of the springs, taking a few additional photos of the door only takes a little extra effort.
5. Photograph the identification plate and all labels and markings so that they are clearly readable.
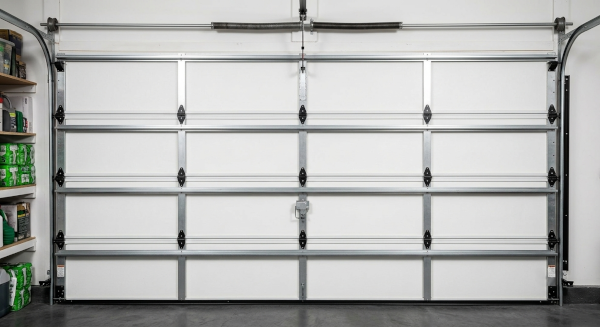
6. Photograph the garage door from the inside while it is closed.
The centre of the photo should align with the centre of the garage door. Make sure all vertical hardware is visible.
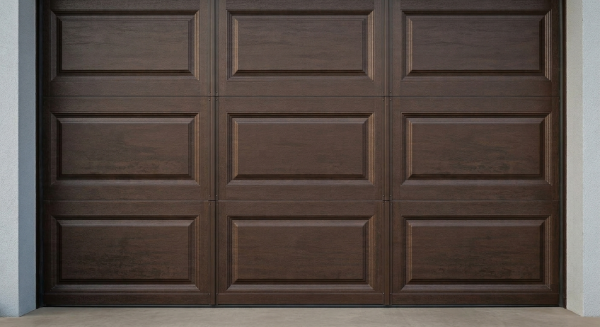
7. Photograph the outside of the garage door.
Photograph the outside of the garage door from a distance of approximately 1–1.5 metres so that we can clearly see the surface of the door.
8. Photograph anything else that you think may be useful.
SENDING THE PHOTOS
How you send the photos is also important. Messaging apps on iPhone and Android phones often reduce image quality.
Whenever possible, send the photos directly from your phone by email, as this normally preserves the original image quality. If the email is too large, do not reduce the size or quality of the photos. Instead, send several emails. Please use the same subject line for all of them.
Do not take screenshots of the photos just because screenshots are easier to share. Send the original image files stored on your phone.
Do not create a PDF or document simply to put the photos and your quotation request into a single file. Write a normal email and attach the photos directly.
Do not compress the photos into an archive file. Our email system may reject some compressed files.
Do not use file-sharing websites, as our email system may remove unfamiliar or suspicious links.
If you use a well-known cloud storage service such as Dropbox or Google Drive, make sure the files are publicly accessible through the shared link. We cannot sign in to these services using our own account to access your files.
Do not make a video unless it is necessary for us to see the problem while the garage door is moving.